

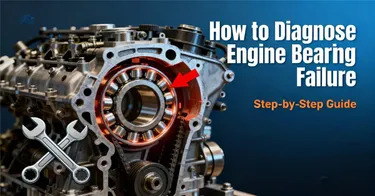
How to Diagnose Engine Bearing Failure
Learn early warning signs of engine bearing wear and rod knock. Diagnose problems before they worsen, prevent engine failure, and avoid expensive repairs.
Engine bearings are the unsung heroes of your vehicle’s powertrain—small, precision components that keep critical rotating parts (like the crankshaft and connecting rods) moving smoothly. When these bearings wear or fail, the consequences can be catastrophic: from costly repairs to complete engine seizure. The good news? Bearing failure rarely happens overnight. By recognizing early warning signs and conducting timely diagnostics, you can avoid major damage and save thousands in repair costs.
This guide breaks down everything you need to know about engine bearing failure: their role in the engine, common symptoms (from subtle to severe), root causes, step-by-step diagnostic methods (for both mechanics and DIYers), and whether to repair or rebuild. We’ll also link to essential resources—like our Automotive Engine Parts Glossary and Crankshaft Wholesale page—to help you source quality replacement parts.
What Engine Bearings Do
Before diving into failure symptoms, it’s critical to understand the purpose of engine bearings. These components act as “cushions” between moving metal parts, reducing friction and dissipating heat. The two most critical types of engine bearings are:
1. Crankshaft Bearings (Main Bearings)
- Location: Mounted in the cylinder block, surrounding the crankshaft’s main journals (the smooth, cylindrical sections of the crankshaft).
- Function: Support the entire weight of the crankshaft and absorb rotational forces. They ensure the crankshaft spins evenly without wobbling or making contact with the cylinder block.
- Design: Typically made of a soft metal alloy (e.g., babbitt, a lead-tin-copper mixture) bonded to a steel backing. The soft alloy conforms to minor imperfections and traps oil to create a lubricating film.
2. Connecting Rod Bearings (Rod Bearings)
- Location: Between the connecting rods and the crankshaft’s rod journals (smaller cylindrical sections that attach to the rods).
- Function: Transmit the piston’s linear motion to the crankshaft’s rotational motion. They must withstand extreme pressure (up to 10 tons per square inch during combustion) and high RPMs.
- Design: Similar to main bearings but smaller, with a thinner alloy layer optimized for high-load conditions.
Why Bearings Are Critical
Without properly functioning bearings, metal-to-metal contact occurs between the crankshaft and cylinder block/connecting rods. This friction generates intense heat, wears down metal surfaces, and eventually leads to seizing—where the crankshaft locks up and the engine stops running entirely. Even minor bearing wear can reduce engine efficiency, increase oil consumption, and shorten the engine’s lifespan.
For a visual reference of how bearings fit into the engine, check out our Automotive Engine Parts Glossary, which includes diagrams and definitions of key components.
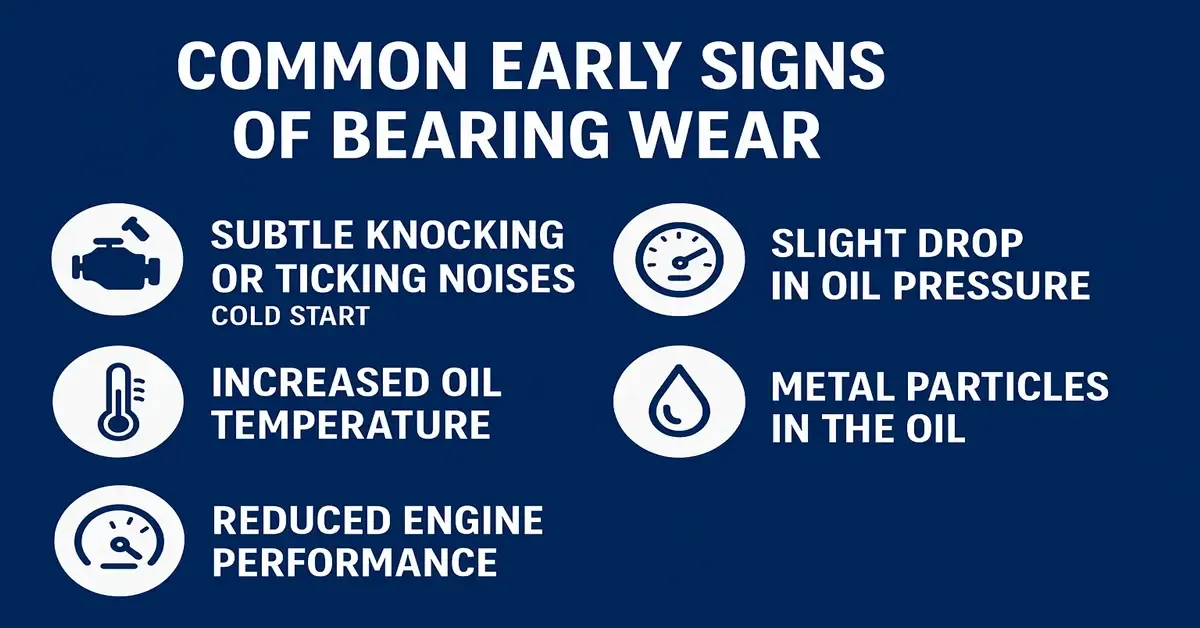
Common Early Signs of Bearing Wear
Engine bearing failure progresses in stages, and early detection is key to minimizing damage. Here are the most subtle but telltale signs of early bearing wear:
1. Subtle Knocking or Ticking Noises (Cold Start)
- Symptom: A faint, rhythmic knocking or ticking sound when starting the engine cold, which fades as the engine warms up.
- Why It Happens: Cold oil is thicker and takes longer to reach the bearings. Worn bearings have reduced clearance, so the oil film is thinner, causing minor metal contact until the oil warms and flows freely.
- How to Differentiate: Unlike valve train noise (which is higher-pitched and consistent), bearing noise is deeper and disappears as oil pressure builds (usually within 1–2 minutes of warming up).
2. Slight Drop in Oil Pressure
- Symptom: The oil pressure gauge reads lower than normal (e.g., 10–15 psi at idle instead of 20–30 psi) or fluctuates unexpectedly.
- Why It Happens: Worn bearings have increased clearance between the bearing and crankshaft journal. This allows oil to leak past the bearing more easily, reducing system pressure.
- Note: Low oil pressure can also indicate a failing oil pump or clogged oil filter—so rule out these issues first (e.g., replace the filter and check oil levels).
3. Increased Oil Temperature
- Symptom: The engine runs hotter than usual, or the oil temperature gauge (if equipped) reads above 220°F (104°C) during normal driving.
- Why It Happens: Worn bearings create more friction, which generates excess heat. This heat transfers to the oil, raising its temperature and reducing its lubricating properties (thinner oil = more wear).
4. Metal Particles in the Oil
- Symptom: Dark, gritty oil or small metal flakes visible on the oil dipstick or drain plug magnet.
- Why It Happens: As bearings wear, tiny metal particles (from the bearing alloy or crankshaft journal) break off and mix with the oil. These particles act as abrasives, accelerating wear on other engine parts.
- How to Check: After draining oil, inspect the drain plug magnet—if it’s covered in metal shavings, this is a red flag for bearing wear.
5. Reduced Engine Performance
- Symptom: Sluggish acceleration, decreased fuel efficiency, or a “rough” feeling when revving the engine.
- Why It Happens: Worn bearings cause uneven crankshaft rotation, which disrupts the engine’s balance. This leads to power loss and inefficient combustion.
Severe Symptoms of Bearing Failure
If early signs are ignored, bearing wear progresses to full failure—with symptoms that demand immediate action (do not drive the vehicle):
1. Loud, Persistent Rod Knock
- Symptom: A deep, rhythmic “knock-knock-knock” sound that increases with engine RPM and does not fade when warm. This is the most classic sign of rod bearing failure.
- Why It Happens: Worn rod bearings allow excessive clearance between the connecting rod and crankshaft. As the piston moves up and down, the rod slams against the crankshaft journal—creating the knocking sound.
- Urgency: Rod knock means the bearings are nearly destroyed. Continuing to drive will cause the crankshaft journal to wear unevenly ( “egg-shaped” damage) or the rod to bend—leading to engine seizure.
2. Complete Loss of Oil Pressure
- Symptom: The oil pressure gauge drops to zero, or the oil pressure warning light illuminates (often accompanied by a chime).
- Why It Happens: Severely worn bearings have enough clearance to allow all oil to leak past, leaving no pressure to lubricate the engine.
- Urgency: Zero oil pressure = catastrophic engine damage within minutes. Stop the engine immediately and do not restart it.
3. Engine Seizure
- Symptom: The engine suddenly stalls and will not restart. Attempting to crank the engine results in a “locked” feeling (no rotation).
- Why It Happens: Worn bearings eventually seize to the crankshaft journal (due to heat and lack of lubrication). This locks the crankshaft, preventing the engine from turning.
- Consequence: Seizure often causes bent rods, cracked pistons, or damage to the cylinder block—requiring a full engine rebuild or replacement.
4. Smoke from the Engine Bay
- Symptom: Thick, dark smoke (from burning oil) or a burning smell coming from the engine.
- Why It Happens: Seized bearings generate extreme heat, which can melt the bearing alloy or damage the oil pan gasket—leading to oil leaks and burning oil.
5. Metallic Grinding Noise
- Symptom: A loud, scraping, or grinding sound that persists even at idle.
- Why It Happens: This indicates metal-to-metal contact between the crankshaft and bearing backing plate (the steel layer under the bearing alloy). The alloy has worn away entirely, leaving no lubrication barrier.
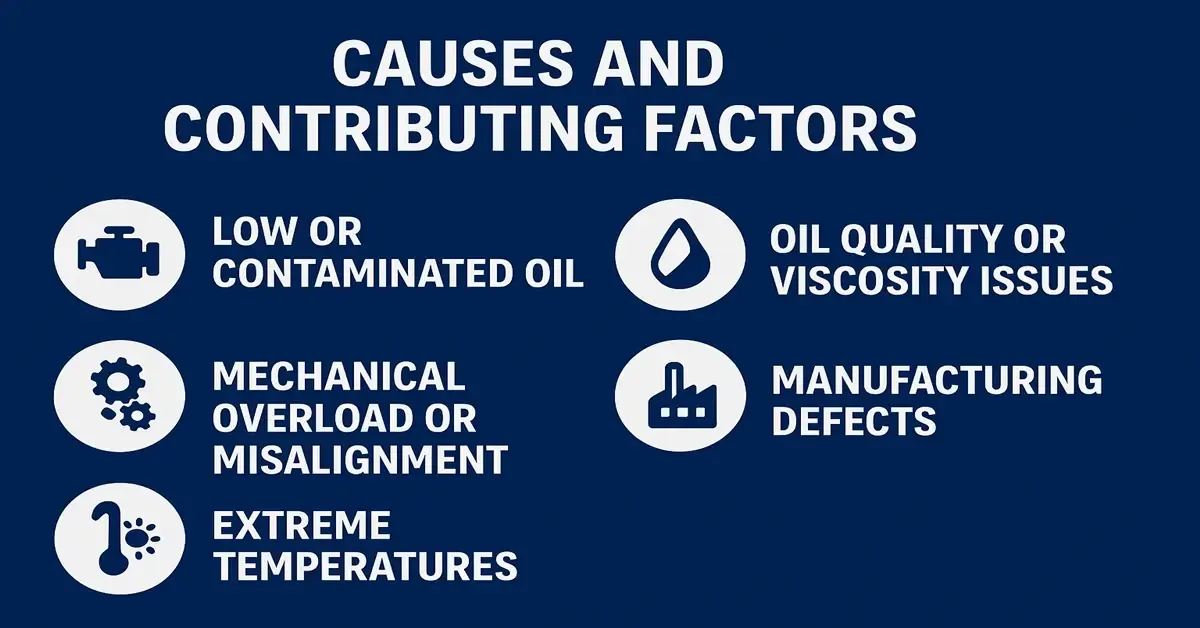
Causes and Contributing Factors
Engine bearing failure is almost always preventable—root causes typically relate to poor lubrication, contamination, or mechanical stress. Here are the most common factors:
1. Low or Contaminated Oil
- Low Oil Level: The #1 cause of bearing failure. If oil levels are too low, the oil pump cannot deliver enough lubricant to the bearings, resulting in metal-to-metal contact.
- Contaminated Oil: Dirt, dust, metal particles, or water in the oil scratches the bearing surface and breaks down the lubricating film. Common sources of contamination: dirty air filters, leaky gaskets, or mixing incompatible oils.
2. Oil Quality or Viscosity Issues
- Using the Wrong Oil: Using oil with a viscosity too low (e.g., 5W-20 instead of 10W-30) for high-temperature or high-load conditions reduces the oil film’s thickness. Using oil with additives incompatible with the bearing alloy (e.g., some synthetic oils with high sulfur content) can corrode the bearing material.
- Old Oil: Oil degrades over time (even if the engine isn’t driven). Degraded oil loses its lubricating properties, leading to increased friction.
3. Mechanical Overload or Misalignment
- Overloading the Engine: Towing heavy loads, racing, or frequent hard acceleration increases pressure on the rod bearings—wearing them out faster.
- Crankshaft Misalignment: A bent crankshaft (from a previous accident or improper installation) causes uneven pressure on the main bearings, leading to premature wear.
- Poor Installation: Incorrectly torquing bearing caps or using damaged bearing seats (in the cylinder block) creates uneven contact between the bearing and crankshaft.
4. Manufacturing Defects
- Low-Quality Bearings: Cheap, non-OEM bearings (e.g., those with inconsistent alloy thickness or poor bonding) are prone to early failure. Linkteco’s Crankshaft Wholesale line includes OEM-compatible bearings tested to IATF 16949 standards, ensuring consistent quality.
- Crankshaft Journal Imperfections: Factory defects in the crankshaft journal (e.g., rough surface finish) can abrade the bearing alloy.
5. Extreme Temperatures
- Overheating: Engines that run hot (due to a faulty thermostat, clogged radiator, or leaking head gasket) thin the oil and accelerate bearing wear.
- Cold Starts: Frequent cold starts (especially in cold climates) delay oil flow to the bearings, causing temporary metal contact until the oil warms.
Diagnostic Procedures
If you suspect bearing wear, use these diagnostic steps to confirm the issue. We’ve split them into DIY-friendly methods and professional mechanic techniques:
DIY Diagnostic Steps (No Special Tools Needed)
1. Listen for Noise Patterns
- Cold Start Test: Start the engine cold and listen for knocking/ticking sounds. If the noise fades as the engine warms (5–10 minutes), it’s likely early bearing wear.
- RPM Test: Rev the engine gently from idle to 2,000 RPM. If the knocking sound increases with RPM (but is not present at idle), it’s a strong indicator of rod bearing wear.
- Load Test: Drive the vehicle at a steady speed (40–50 mph) and gently accelerate. If the knocking gets louder under load, this confirms rod bearing issues (valve train noise usually doesn’t change with load).
- Tip: Use a long screwdriver as a “stethoscope”—place the metal end on the cylinder block (near the crankshaft) and the handle to your ear. Bearing noise will be louder and more distinct than other engine sounds.
2. Check Oil Pressure and Temperature
- Oil Pressure: Use a manual oil pressure gauge (available at auto parts stores for 20–50) to measure pressure. Normal idle pressure for most engines is 20–30 psi; if it’s below 15 psi, bearing wear is likely.
- Oil Temperature: If your vehicle doesn’t have an oil temp gauge, use an OBD-II scanner ( 30–100) to read live data. Oil temperatures above 220°F during normal driving indicate excess friction (possibly from bearings).
3. Inspect Oil for Metal Particles
- Drain Plug Check: Drain the oil (when warm, not hot) and inspect the drain plug magnet. If it’s covered in fine metal shavings or flakes, the bearings are wearing.
- Oil Filter Check: Cut open the old oil filter (use a filter cutter, 10–15) and inspect the filter media. Metal particles trapped in the filter confirm internal wear.
4. Perform a Compression Test
- Tool Needed: Compression tester ( 30–60).
- Procedure: Remove spark plugs, disable the fuel pump, and connect the tester to each cylinder. Crank the engine and record compression readings.
- What to Look For: Low compression in multiple cylinders (especially adjacent ones) can indicate rod bearing failure (bent rods from bearing wear cause poor compression).
Professional Diagnostic Techniques (Mechanic-Only)
1. Oil Analysis
- Process: A sample of the engine oil is sent to a lab (e.g., Blackstone Laboratories) for chemical and particle analysis.
- What It Reveals: The lab measures metal content (lead, tin, copper—indicators of bearing wear), oil viscosity, and contamination levels. This is the most accurate way to detect early bearing wear.
2. Endoscope Inspection
- Tool: A borescope (flexible camera) is inserted through the spark plug hole or oil fill cap to visualize the crankshaft journals and bearings.
- What to Look For: Worn bearing surfaces (scratches, pitting), uneven journal wear, or oil leaks around the bearings.
3. Crankshaft Runout Test
- Tool: Dial indicator.
- Process: The engine is disassembled, and the crankshaft is checked for straightness (runout). Excessive runout (more than 0.001 inches) indicates misalignment, which contributes to bearing wear.
4. Bearing Clearance Measurement
- Tool: Plastigauge (a thin, plastic strip that deforms under pressure).
- Process: Plastigauge is placed between the bearing and crankshaft journal. The bearing cap is torqued to spec, and the deformed Plastigauge is measured to check clearance.
- What to Look For: Clearance outside the manufacturer’s specs (typically 0.001–0.003 inches for main bearings) indicates wear.
Repair vs. Full Engine Rebuild
The severity of bearing failure determines whether you can repair the engine or need a full rebuild. Here’s how to decide:
When Repair Is Possible (Early-Stage Wear)
Repair is feasible if bearing wear is caught early—before the crankshaft journals, connecting rods, or cylinder block sustain permanent damage. Here’s what to expect:Key Conditions for Repair
- No loud, persistent rod knock (noise only occurs on cold starts and fades).
- Oil pressure is slightly low but not zero.
- Metal particles in the oil are minimal (fine shavings, not large flakes).
- Crankshaft journals are smooth (no scoring, pitting, or “egg-shaped” wear).
- Connecting rods are straight (no bending from excessive bearing clearance).
Repair Process
- Engine Teardown (Partial): The cylinder head and oil pan are removed to access the crankshaft and bearings. The crankshaft does not need to be fully removed (saves time and cost).
- Bearing Replacement: Worn main and rod bearings are replaced with OEM-compatible parts. Linkteco’s crankshaft bearing kits include precision-machined alloy bearings that meet IATF 16949 standards, ensuring proper fit and lubrication.
- Crankshaft Journal Inspection: The crankshaft journals are measured for wear and polished to remove minor imperfections (if within manufacturer specs). If journal wear exceeds 0.001 inches, the crankshaft may need to be ground (reconditioned) to a smaller size, requiring oversized bearings.
- Oil System Cleaning: The oil pan, oil pump, and oil galleries are thoroughly cleaned to remove metal particles (prevents future bearing wear).
- Fluid and Filter Replacement: New engine oil (with the correct viscosity for your vehicle) and a high-quality oil filter are installed.
Cost of Repair
- DIY Repair: $300–$800 (parts + tools). Parts cost: $150–$400 (bearings, gaskets, oil); tools (if not owned): $150–$400 (bearing puller, torque wrench, plastigauge).
- Professional Repair: $800–$1,800 (parts + labor). Labor accounts for 50–60% of the cost (2–4 hours of shop time).
Pros of Repair
- Significantly cheaper than a full rebuild.
- Minimal downtime (1–2 days for professionals, 1–2 weekends for DIYers).
- Restores engine performance without replacing major components.
When a Full Engine Rebuild Is Necessary (Severe Failure)
A full engine rebuild is required if bearing failure has caused secondary damage to critical components. Here’s the breakdown:Key Reasons for Full Rebuild
- Loud, persistent rod knock or metallic grinding noise (bearings are fully worn).
- Crankshaft journals are damaged (scored, pitted, or out-of-round—more than 0.003 inches of wear).
- Connecting rods are bent or cracked (from excessive bearing clearance or engine seizure).
- Cylinder block bearing seats are damaged (worn or distorted, preventing proper bearing fit).
- Engine seizure has occurred (resulting in bent pistons, cracked cylinder walls, or damaged valve train components).
Rebuild Process
A full rebuild addresses both top-end and bottom-end components, including:- Complete engine disassembly (removal of crankshaft, pistons, connecting rods, cylinder head).
- Replacement of damaged parts: crankshaft (or reconditioning via grinding), connecting rods, pistons, piston rings, main/rod bearings, and gaskets.
- Cylinder block and cylinder head resurfacing (to ensure flat mating surfaces).
- Valve train overhaul (replacement of valves, valve springs, and rocker arms if damaged).
- Reassembly with OEM-compatible parts (Linkteco’s full engine rebuild kits include all necessary components, from crankshafts to gaskets).
Cost of Full Rebuild
- Professional Rebuild: $4,000–$10,000+ (varies by engine size and parts quality). For example:
- 4-cylinder engine (e.g., Honda Civic): $4,000–$6,000.
- V8 or diesel engine (e.g., Ford F-150): $7,000–$10,000+.
- DIY Rebuild: $2,000–$5,000 (parts only). Requires advanced skills, specialized tools (e.g., engine stand, cylinder boring machine), and 2–4 weeks.
Pros of Full Rebuild
- Restores the engine to factory specifications (or better, with performance upgrades).
- Extends engine life by 100,000–150,000 miles.
- Eliminates all underlying issues (not just bearing failure).
FAQ
1. Can you drive with a rod knock (symptom of severe rod bearing failure)?
No—driving with a rod knock is extremely risky. Rod knock indicates the rod bearings are nearly destroyed, and continued operation will:- Wear the crankshaft journal into an “egg-shaped” form (unrepairable without grinding or replacement).
- Bend or crack the connecting rod (leading to engine seizure).
- Cause catastrophic engine failure (costing $4,000+ to rebuild/replace, vs. $800–$1,800 for early repair).
2. How much does it cost to repair an engine bearing failure?
Cost depends on the severity of damage:- Early-stage repair (bearing replacement only): $300–$1,800 (DIY vs. professional).
- Crankshaft reconditioning + bearing replacement: $1,200–$2,500 (professional).
- Full engine rebuild (severe damage): $4,000–$10,000+.
3. How long do engine bearings last under normal conditions?
Engine bearings should last 150,000–250,000 mileswith proper maintenance (regular oil changes, using the correct oil viscosity). Factors that shorten lifespan:- Frequent cold starts.
- Towing heavy loads or aggressive driving.
- Neglecting oil changes (oil degrades every 5,000–7,500 miles).
- Using low-quality or incorrect oil.
4. Can I replace just one bearing (e.g., a single rod bearing) instead of all?
It’s not recommended. Even if only one bearing shows wear, others are likely near the end of their lifespan (bearings wear at similar rates). Replacing only one bearing:- Risks uneven wear on the crankshaft journal.
- Requires partial engine teardown again soon (increasing labor costs).
- May miss hidden damage (e.g., metal particles in the oil affecting other bearings).
5. How can I prevent engine bearing failure?
The top prevention strategies are:- Regular oil changes: Replace oil and filter every 5,000–7,500 miles (or as per manufacturer recommendations).
- Use the correct oil: Choose oil with the viscosity specified in your vehicle’s manual (e.g., 5W-30 for most passenger cars, 15W-40 for diesel trucks).
- Check oil levels frequently: Top off oil at the first sign of low levels (do not let the oil light illuminate).
- Avoid overheating: Fix cooling system issues (e.g., faulty thermostat, leaking radiator) immediately.
- Use high-quality parts: Choose OEM-compatible bearings and oil filters (Linkteco’s bearings are tested to withstand extreme pressure and temperature).
6. Do I need to break in new bearings after replacement?
Yes—new bearings require a gentle break-in period to ensure proper seating and lubrication:- Avoid high RPMs (keep engine below 3,000 RPM) for the first 500 miles.
- Do not tow or haul heavy loads during break-in.
- Change the oil and filter after 500 miles (removes any metal particles from the break-in process).
Conclusion
Engine bearing failure is a preventable disaster—early detection and proactive maintenance are your best defenses. By recognizing subtle signs like cold-start knocking, low oil pressure, or metal particles in the oil, you can avoid costly engine rebuilds and extend your vehicle’s life. When repairs are needed, using high-quality, OEM-compatible parts (like Linkteco’s crankshaft bearings and rebuild kits) ensures reliability and longevity. Whether you’re a professional mechanic sourcing bulk parts or a DIYer tackling a repair, Linkteco has the resources you need:- OEM-quality bearings, crankshafts, and rebuild kits tested to IATF 16949 standards.
- Detailed technical guides like our Complete Engine Rebuild Guide to walk you through the process.
- Wholesale pricing and flexible MOQs to fit your business or project needs.

Catalog
Quick Link
Support
Contact
Tel: +8619168959101
Email: info@linktecowholesale.com
Add: 12/F, Building 3C, TianAn Cloud Park Phase 1, Bantian, Longgang District, Shenzhen, 518129, China
©2026 LinkTeco All Rights Reserved.